TOKYO Diaper Clutch sewing pattern
[ssba-buttons]
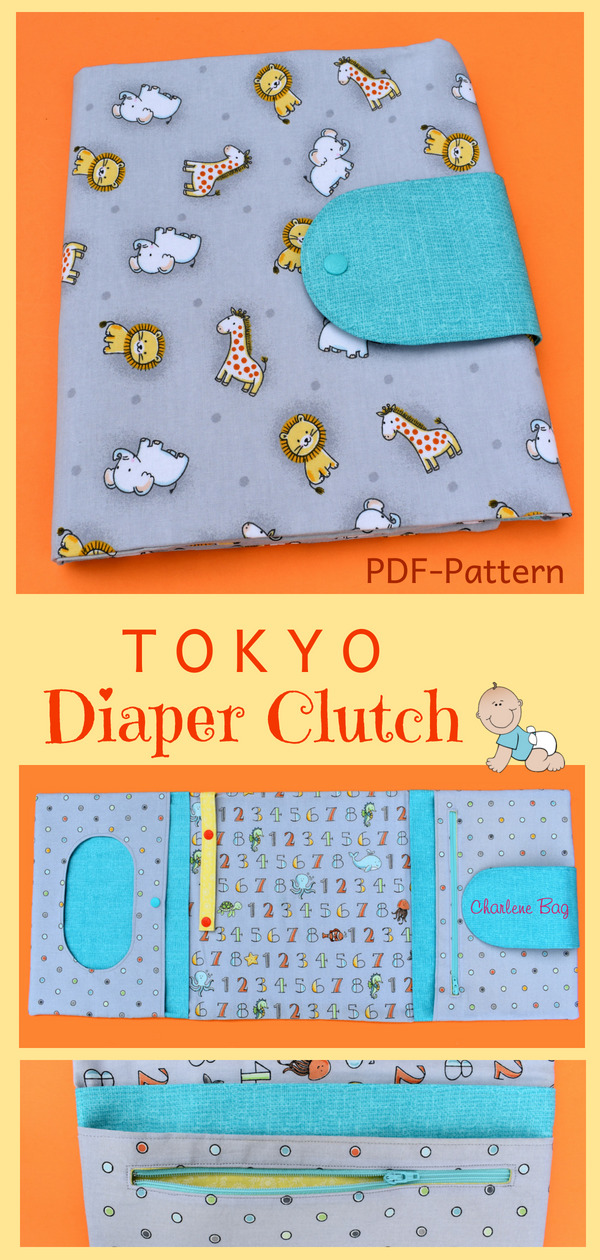
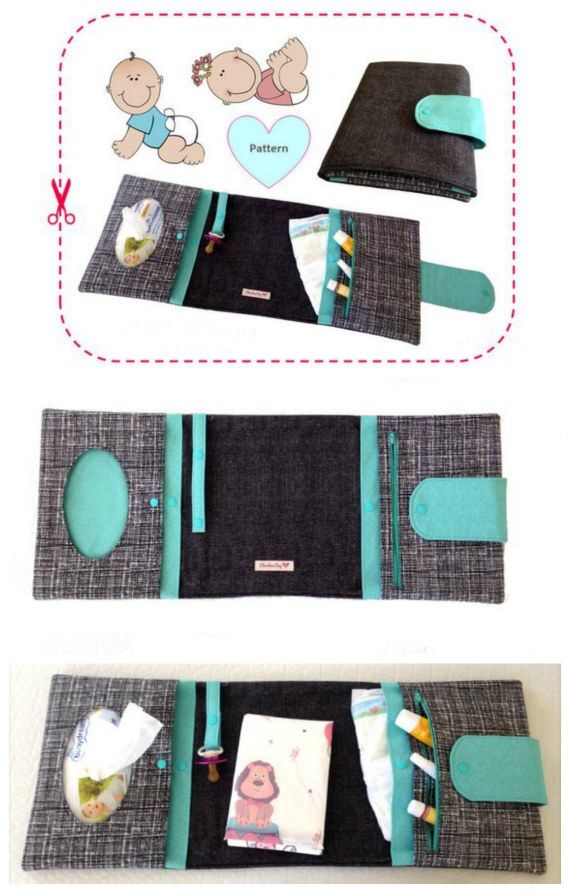
Create your own useful and unique diaper clutch with this easy-to-follow and step-by-step “TOKYO Diaper Clutch” sewing pattern. The “TOKYO Diaper Clutch” stores all necessary baby items and is (when unfolded) even long enough to use it as a changing mat for your little one. It can be a beautiful gift for a baby shower or a “newborn mom”, too.
The inside of the bag comes with:-
- Three compartments for keeping diapers, burp cloth, changing essentials etc.
- A compartment with an opening to take out baby wipes easily.
- A zipper pocket to store smaller items like crèmes, lotions, clipper etc.
- A holder for a pacifier.
You can make the clutch with the mentioned compartments and features or adjust the pattern to your needs. You can also personalize your bag with appliqués or embroideries to make it very unique. The tutorial describes different options for the bag closure.
The bag measures 27″ by 11″ when it’s opened and 9″ by 11″ when it’s folded.
The level of this pattern is “confident beginner” to “intermediate” – depending on your experiences with zippers, closures and curved stitches. Nevertheless, this pattern provides you with detailed instructions and images for each bag-making step.
What you will need to make the Tokyo Diaper Clutch:-
- 3/4 yard (70cm) of a 44″ (120cm) wide cotton fabric for exterior and lining,
- 1/2 yard (45cm) of a 44″ (120cm) wide fabric for bigger compartments, pacifier holder and bag closure,
- 1/2 yard (45cm) of a 44″ (120cm) wide fabric for wipes compartment and zipper pocket,
- 1- 1/2 yards (140cm) of 20″ (50cm) wide lightweight or midweight fusible interfacing,
- 11″ (28cm) of 45″ (115cm) wide fusible fleece,
- 9″ (23cm) color matching zipper,
- Plastic snaps and tools for installing the snaps,
- Color matching thread,
- Ruler and rotary cutter,
- Fabric marker pen – we love the Frixion pens,
- Some pins or “Wonder Clips”,
- Optional – “Wash Away Wonder Tape”,
- Sewing machine.


