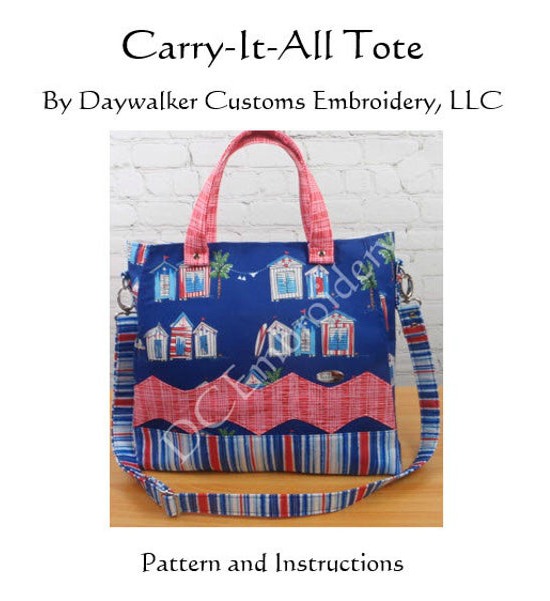
Carry It All Tote Bag pattern
[ssba-buttons]
The Carry-It-All Tote Bag is great for a busy day at work, shopping or travelling, or just taking along to the beach!
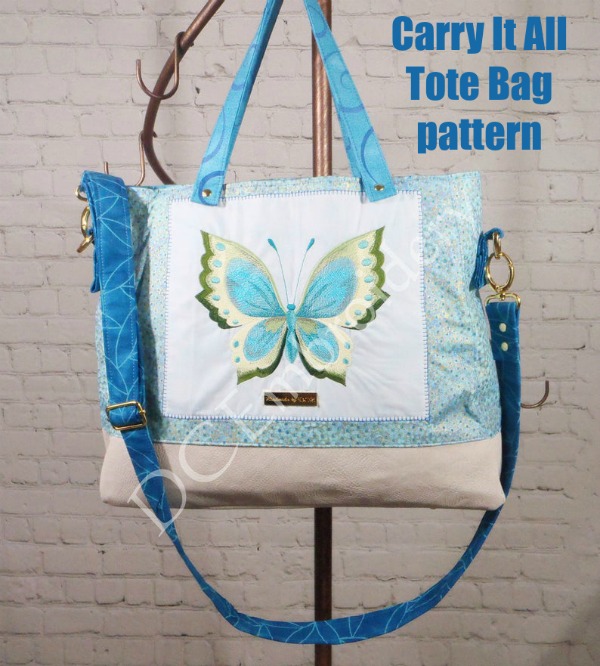
It features lots of pockets and you can choose a cell phone pocket or a large divided pocket for the back of the bag. You can choose to add the decorative chevrons in two different sizes, or not at all, and you can use a featured fabric or choose to add embroidered panels. Quilting the bag panels can look great too. This bag pattern is ideal for adapting it to your own design ideas.
This bag is large enough it lets you show off even some of the larger fabric panel prints! With both handles and an adjustable strap, this lovely bag can be carried by hand, on your shoulder, or as a crossbody bag. It even has a key fob clip for your keys on the inside where there is also a zippered pocket and two other slip pockets to hold all your personal items easily.
All that and this is really a bag that a beginner to intermediate bag maker can make with ease.
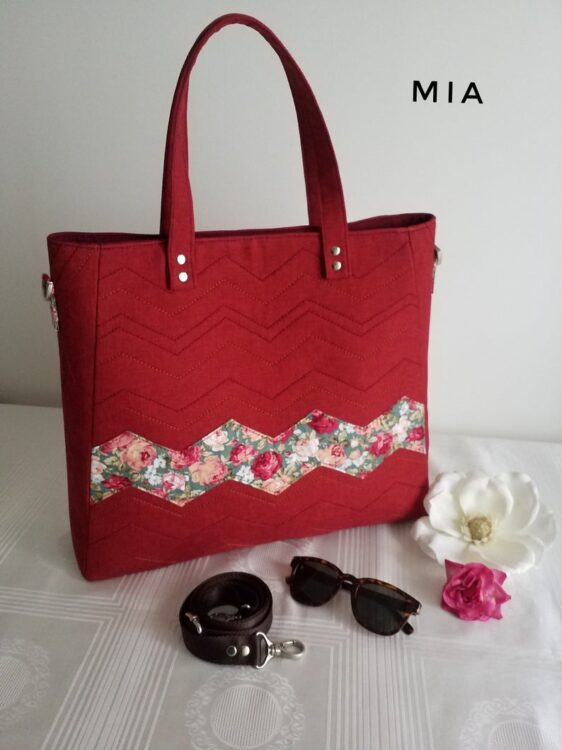
The designer has included instructions to sew her Carry It All Tote Bag in several variations, as follows:
- All fabric,
- Cork, vinyl, faux leather bottom and fabric top,
- Embroidered focal point or chevron or both,
- Large or small-sized chevron, or no chevron at all,
- Large exterior back divider pocket or cell phone pocket.
When you have finished making your own Carry It All Tote Bag it will measure approximately 16″ long by 12½” tall by 4″ deep.
What you will need to make the Carry It All Tote Bag:
- 1 – 1½ yards for your primary exterior front/back/sides of the tote,
- ¼ to 1/3 yards of exterior contrasting fabric/vinyl/faux leather/cork for the base and bottom of the handbag,
- ½ a yard of exterior contrasting fabric for the straps, strap connectors and handles,
- ¼ of a yard for the chevron accent,
- 1 – 1½ yards of lining fabric or ¾ of a yard of two different coordinating lining fabrics,
- One 10″ by 10″ square to embroider on if adding this feature. Make two if you are adding to both the front and back of the bag,
- 2½ yards of 40″ wide woven fusible interfacing (5 yards if using 20″ wide) – Pellon SF101 or Wovenfuse,
- 16″ by 4″ piece of fusible heavy stabilizer – Peltex or Decovil Heavy for the bottom base,
- ½ to ¾ yard of fusible fleece – Pellon Thermolam or other one-sided fusible fleece,
- ½ to ¾ yard of fusible medium weight stabilizer – Decovil Light or Pellon 809,
- One dress size #3 zipper at least 12″ to 14″ long,
- One 1¼” triglide/slider used in making the strap adjustable,
- Two 1¼” swivel hooks (clasps) for the strap,
- Four purse feet,
- Fourteen rivets – generally double-headed 9mm cap by 8mm shank, but may need 12mm shank if using thicker materials,
- Two 1¼” D rings for the snap connectors,
- Two magnetic snaps – you will need one more if you decide to use a snap on the back divider pocket,
- Basic sewing supplies,
- A sewing machine.
CLICK HERE FOR THE PATTERN
This pattern is also available with a complete step by step video tutorial for an extra charge. You can grab the pattern plus video here ->


