Snap bag – free pattern
[ssba-buttons]
[NOTE – the Deedle and Thread sewing blog has disappeared. We hate it when that happens and good sewing content is lost forever. However this page was archived by the internet time machine, but only the written content. The directions for cutting the fabric and the sewing instructions are still there, but the images are no longer available. Please look here for an alternative similar snap bag with video tutorial.]
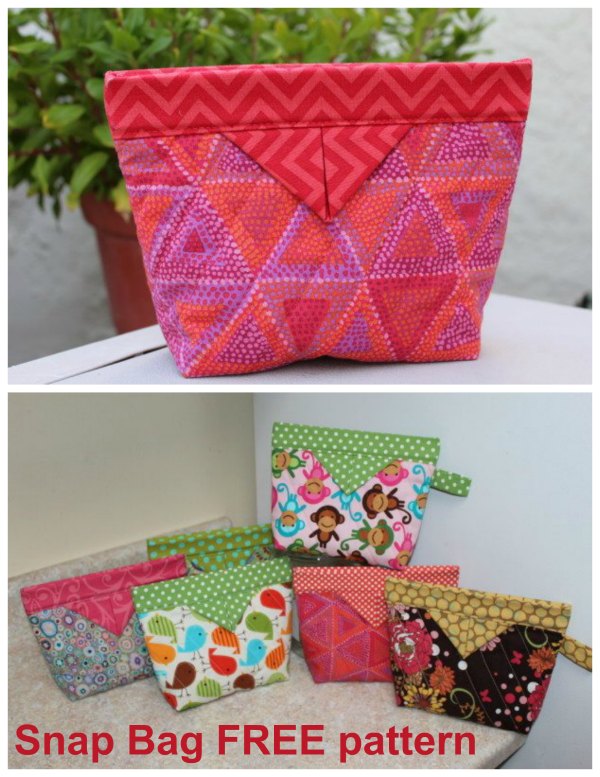
This very talented and creative designer has not just kindly given us all a free pattern and tutorial for her Snap Bag but she has also used a novel way of keeping her bag closed.
To keep her bag closed she has recycled a used metal tape measure from a home improvement center. Fortunately, her husband had an old tape measure he was happy to donate.
The designer comments that as with any sewing project, there is room to personalize and modify her Snap Bag to your specific needs. The dimensions can change if you wish, but she recommends that you make one first and then you will know what measurements need to change for the second bag.
She says that you can add embroidery, eliminate the 2″ box pleat, use up to three fabrics, or omit the prairie point handles and sew a loop, hair tie as the handle, etc. The choice is yours.
When you have finished making yourself a Snap Bag it will measure approximately 8″ wide by 6″ high by 2″ deep.
What you will need to make the Snap Bag:
- 9″ by 14.5″ of quilted fabric (or fabric and batting to quilt your own) for the outer bag fabric.
- 9″ by 18.5″ of lining fabric. This fabric covers the measuring tape across the top of the bag.
- 2.5″ by 4.5″ of lining or outer fabric (your choice) for the side loop handle.
- 11″ by 2.5″ for the wrist handle (optional).
- Cut two 4.5″ by 4.5″ (same fabric as the lining) for the handles.
- Coordinating thread for both fabrics.
- 9″ by 2″ of fusible interfacing (use up small scraps of leftover interfacing and piece together).
- A 1″ tape measure from a hardware store. (Check to see what screwdriver or tapered cross tip screwdriver you have handy to undo the outer case of the tape measure).
- A roll of tape (either electrical or blue painter’s tape to cover tape measure ends).
- Basic sewing supplies.
- A sewing machine.
Liking this free pattern? Great! You would make our day if you ‘bought us a coffee’ to help with the site running costs. Thank you.


